Milk Techniques
Oat Milk Steaming Masterclass
Master oat milk microfoam with proper temperature control and brand-specific techniques for perfect plant-based lattes.
Master oat milk microfoam with proper temperature control and brand-specific techniques for perfect plant-based lattes.
Plant milk frothing generates frustrated threads weekly on r/espresso—burnt oat milk, foam collapse, inability to achieve latte art. Existing milk content assumes dairy, leaving plant-based users underserved with techniques that don't translate.
This guide provides oat milk-specific techniques validated by Reddit consensus, covering temperature differences, aeration requirements, and brand-specific recommendations.
Sweet spot for lactose sweetness
Proteins break down above this
Separates easily when too hot
More heat-stable than oat
Critical: Oat milk requires 5-10°C lower temperature than dairy. This is NON-NEGOTIABLE for proper texture.
Fat: 3%
Foamability: Excellent
Temp: 55-60°C (131-140°F)
Latte Art: Very good—most consistent for latte art
Widely available
Gold standard for oat milk. Most forgiving, best microfoam texture.
Fat: 3.5%
Foamability: Very good
Temp: 55-60°C (131-140°F)
Latte Art: Good—slightly less stable than Oatly
Common in US
Great budget alternative to Oatly, slightly different flavor profile.
Fat: 3%
Foamability: Excellent
Temp: 55-60°C (131-140°F)
Latte Art: Excellent—designed for latte art
Specialty stores, UK common
Premium option, very creamy texture. Popular in UK specialty cafes.
Fat: 4%
Foamability: Good
Temp: 55-58°C (131-136°F)
Latte Art: Moderate—foam less stable
Very common in US
Budget option. Sweeter flavor may overpower espresso. Less stable foam.
Fat: 3.5%
Foamability: Poor
Temp: N/A—not recommended
Latte Art: Poor—foam collapses quickly
Very common but wrong product
Do NOT use regular Oatly for steaming. Barista edition has necessary stabilizers.
Oat milk scalds at lower temp than dairy—cold start extends working time
Pitcher and milk both refrigerated. Pour cold milk into cold pitcher.
Temp: Start at 4-8°C (40-46°F)
Remove condensation that would dilute oat milk (more sensitive than dairy)
2-3 second purge before submerging wand
Oat milk needs less aeration than dairy—too much creates large bubbles
Wand tip just below surface, off-center near pitcher spout
Over-aeration creates meringue-like texture, not microfoam
3-5 seconds of gentle hissing sound, creating small whirlpool
Temp: Until 30-35°C (86-95°F)
Build silky microfoam without adding more air
Submerge wand fully, maintain whirlpool, heat to target temp
Temp: To 55-60°C (131-140°F)—STOP HERE
Oat milk foam separates faster than dairy—30 second window
Tap pitcher to remove large bubbles, swirl to integrate, pour within 30 sec
Temp: Optimal pour temp: 55-60°C
Why it fails: Oat milk proteins break down above 60°C, becoming thin and chalky
Result: Watery texture, separated foam, unpleasant mouthfeel
Fix: Stop at 55-60°C. Hand should be warm but comfortable on pitcher.
Why it fails: Oat milk froths more easily than dairy—overdoing creates stiff foam
Result: Dry, meringue-like foam that won't pour for latte art
Fix: 3-5 seconds aeration max. Less is more with oat milk.
Why it fails: Regular oat milk lacks stabilizers needed for microfoam structure
Result: Foam collapses immediately, no texture development
Fix: Only use 'Barista' labeled oat milk. Worth the price difference.
Why it fails: Oat milk foam separates within 60 seconds of steaming
Result: Separated layers, can't pour latte art, need to re-swirl
Fix: Pour immediately after steaming. Have espresso ready before steaming.
Why it fails: High pressure creates large bubbles in delicate oat milk
Result: Bubbly, soapy texture instead of silky microfoam
Fix: Use lower steam pressure if adjustable. Gentle technique essential.
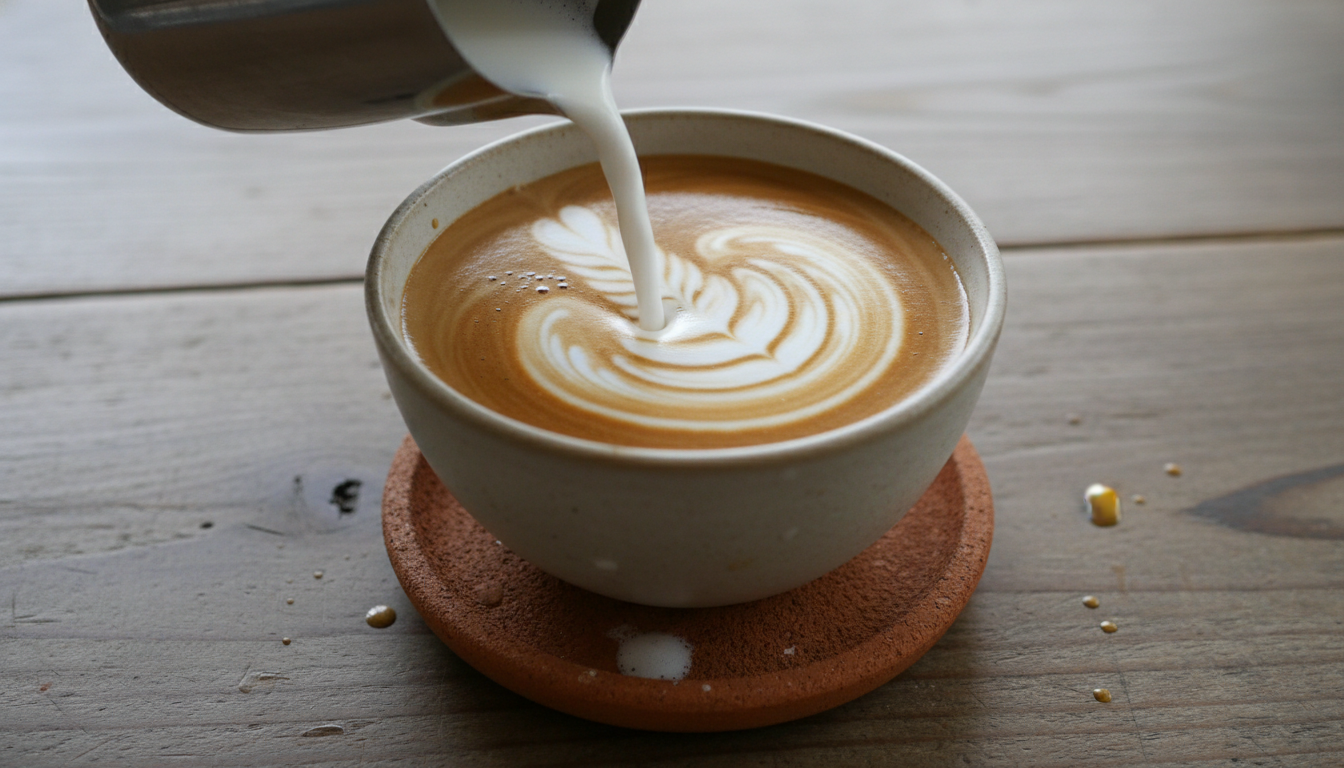
Oat milk latte art is absolutely possible, but requires technique adjustments. Here's what works:
Oat milk foam is less dense than dairy—pours differently
Start pour closer to espresso surface than with dairy
Oat milk integrates differently, needs gentle introduction
Start slow to sink through crema, then speed up for pattern
Oat milk creates softer contrast than dairy in latte art
Focus on clean lines rather than stark white-on-brown contrast
Oat milk separates faster—reintegrate foam if delayed
Quick swirl immediately before pour if 20+ seconds have passed
Oat milk art won't look identical to dairy—different aesthetic
Appreciate the softer, creamier appearance of oat milk art
With proper temperature control and technique, oat milk creates beautiful microfoam and latte art rivaling dairy.
Master Latte Art