Eureka Mignon Notte Grind Settings for Espresso and Pour Over
Complete dial setting guide, adjustment techniques, and maintenance protocols for consistent grind quality across brewing methods
Quick Answer
The Eureka Mignon Notte operates from 0 (finest) to 5 (coarsest) on the stepped adjustment dial. For espresso, start at setting 1-1.5. For pour over, begin at setting 3-3.5. The stepless micrometric collar enables fine-tuning between steps.
Eureka Mignon Notte Grind Setting Range
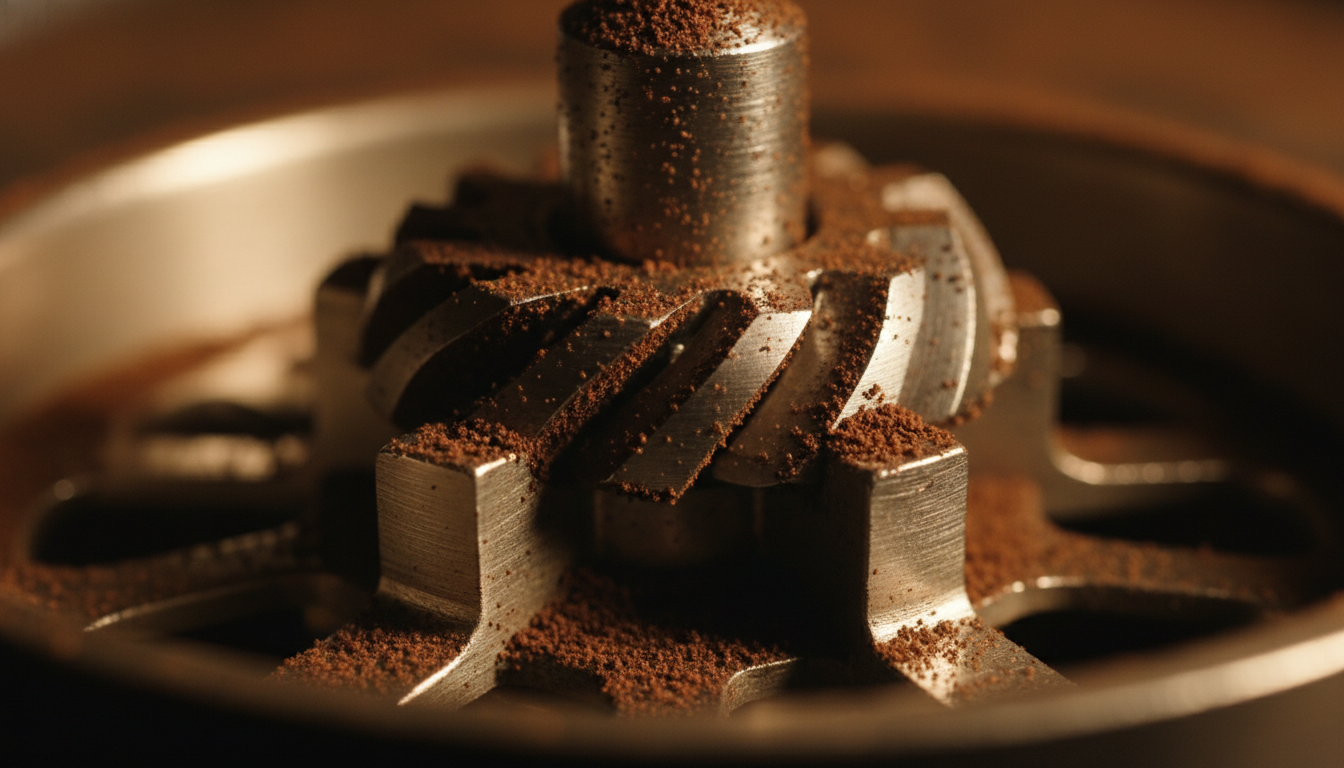
Adjustment System Architecture
Eureka Mignon Notte Adjustment Mechanism: The Eureka Mignon Notte features a stepped macro adjustment dial (numbered 0-5) combined with a stepless micrometric collar for fine-tuning. The dial moves in discrete increments while the collar provides infinite adjustability within each step range.
Dial Number to Grind Size Mapping
0.0 - 0.5: Turkish coffee and ultra-fine espresso (powder consistency)
0.5 - 1.5: Espresso range (fine, sugar-like texture)
1.5 - 2.5: Moka pot and AeroPress (medium-fine)
2.5 - 3.5: Pour over and drip coffee (medium)
3.5 - 4.5: Chemex and batch brew (medium-coarse)
4.5 - 5.0: French press and cold brew (coarse)
Espresso Starting Point: Dial Numbers
Recommended Espresso Settings
Baseline Espresso Setting: Begin at dial setting 1.0-1.5 for standard espresso extraction. This range positions the 50mm flat steel burrs at the optimal distance for 25-30 second shot times with standard 18-20g doses.
Espresso Dial Settings by Bean Characteristic
| Bean Type | Dial Setting | Shot Time Target | Brew Ratio |
|---|---|---|---|
| Light roast, high altitude | 1.0-1.2 | 28-32 seconds | 1:2.5 |
| Medium roast, balanced | 1.2-1.5 | 25-28 seconds | 1:2 |
| Dark roast, oily | 1.5-1.8 | 22-25 seconds | 1:1.8 |
Espresso Dial-In Protocol
- 1. Start at 1.2: Set the Eureka Mignon Notte dial to 1.2 as the baseline position
- 2. Grind 18g dose: Weigh coffee beans and grind into portafilter
- 3. Evaluate shot time: Target 25-30 seconds for 36g output
- 4. Adjust finer: If shot runs under 25 seconds, decrease dial number by 0.1-0.2
- 5. Adjust coarser: If shot runs over 30 seconds, increase dial number by 0.1-0.2
- 6. Purge 2-3g: Grind retention requires purging between adjustments
Pour Over Starting Point: Dial Numbers
Recommended Pour Over Settings
Baseline Pour Over Setting: Begin at dial setting 3.0-3.5 for pour over brewing. This range produces medium grind particles optimal for 3-4 minute brew times with V60, Kalita Wave, and similar drip methods.
Pour Over Dial Settings by Method
| Brew Method | Dial Setting | Grind Appearance | Brew Time |
|---|---|---|---|
| Hario V60 (1-2 cup) | 3.0-3.2 | Kosher salt | 2:30-3:00 |
| Kalita Wave | 3.2-3.5 | Coarse sand | 3:00-3:30 |
| Chemex | 3.5-4.0 | Coarse sand | 3:30-4:30 |
| Melitta/Drip | 3.0-3.3 | Table salt | 2:30-3:30 |
Pour Over Calibration Protocol
- 1. Start at 3.2: Set the Eureka Mignon Notte dial to 3.2 for V60 calibration
- 2. Grind 20g dose: Weigh coffee and grind into vessel
- 3. Brew with 340g water: Use standard 1:17 ratio
- 4. Measure drawdown time: Target completion by 3:00
- 5. Evaluate taste: Sour indicates need for finer grind; bitter indicates need for coarser grind
- 6. Adjust incrementally: Move dial 0.1-0.2 steps between brews
Adjustment Tips for the Eureka Mignon Notte
Dial Movement Best Practices
- • Always adjust while burrs are rotating to prevent jamming
- • Never force the dial past resistance points
- • Count clicks when using the micrometric collar for repeatability
- • Note settings in a brew journal for reference
- • Return to zero (burrs touching) monthly to verify calibration
Switching Between Brewing Methods
- • Espresso to pour over: Purge 3-5g, increase dial 1.5-2.0 steps
- • Pour over to espresso: Decrease dial 1.5-2.0 steps gradually
- • Large adjustments require stepping in 0.5 increments
- • Allow motor to cool between major adjustments
- • Verify new setting with visual grind inspection
Grind Retention Characteristics
Retention Specifications
Eureka Mignon Notte Retention: The grinder retains approximately 1.0-1.5g of ground coffee in the chute and burr chamber between grinding sessions. Retention increases with finer grind settings due to static and particle compaction.
Retention Management Protocol
- 1. Weigh input beans: Measure before grinding for dose accuracy
- 2. Apply RDT (Ross Droplet Technique): Add 2-3 water droplets to beans before grinding to reduce static
- 3. Purge 1-2g when switching beans: Remove retained previous coffee
- 4. Tap grinder body: Dislodge retained grounds in chute
- 5. Use bellows or brush: Remove residual grounds from exit chute
- 6. Single-dose workflow: Consider weighing beans per dose rather than hopper filling
Typical retention per grind session
Retention at finer settings (espresso)
Recommended purge amount
Maintenance for Consistent Grind Quality
Daily Maintenance
- • Brush burr chamber after final use
- • Remove hopper and wipe interior with dry cloth
- • Clean exit chute with grinder brush
- • Verify dial returns to zero without obstruction
Weekly Maintenance
- • Remove top burr using provided wrench
- • Brush both burrs thoroughly with stiff brush
- • Vacuum grind chamber with small attachment
- • Inspect burr edges for damage or dulling
- • Reassemble and verify calibration at zero point
Monthly Maintenance
- • Deep clean with grinder cleaning pellets (Grindz)
- • Run 20-30g of old beans through to remove cleaner residue
- • Verify dial scale alignment with burr touch point
- • Check micrometric collar for debris accumulation
- • Lubricate adjustment threads with food-safe grease if needed
Troubleshooting Uneven Grind Issues
| Symptom | Likely Cause | Solution |
|---|---|---|
| Boulders and fines mixed | Worn or damaged burrs | Replace 50mm flat burrs (typically 500-1000 lbs of coffee) |
| Inconsistent shot times | Retention causing old grind contamination | Implement purge protocol; clean chute thoroughly |
| Choking at normal settings | Burrs misaligned or foreign object damage | Inspect burr alignment; check for rock/metal damage |
| Static causing clumping | Dry environment; no RDT applied | Apply Ross Droplet Technique; use humidity tray |
| Grind setting drift | Loose adjustment collar or vibration | Tighten collar screw; verify locking mechanism engages |
Burr Wear Indicators
The Eureka Mignon Notte 50mm hardened steel burrs require replacement after approximately 500-1000 pounds of coffee (varies by bean hardness and roast level). Signs of burr deterioration include:
- • Increased grinding time for same dose weight
- • Higher proportion of fines at all settings
- • Visible scoring or chipping on burr cutting edges
- • Inconsistent particle size distribution in ground coffee
- • Unusual vibration or noise during grinding
Quick Reference: Eureka Mignon Notte Dial Settings
Espresso Range (0.5 - 2.0)
Filter Range (2.5 - 5.0)
Related Guides & Resources
Espresso Extraction Science & Dialing In
Master espresso extraction theory and apply the Eureka Mignon Notte settings for optimal shot quality.
Pour-Over Brewing Complete Guide
Learn advanced pour-over techniques to pair with the Eureka Mignon Notte grind settings.
Coffee Grinder Buying Guide
Compare the Eureka Mignon Notte with other grinders and understand burr types and motor specifications.
Coffee Bean Storage Best Practices
Preserve bean freshness to maintain consistent grind behavior and flavor extraction.
Frequently Asked Questions
How do I reset the Eureka Mignon Notte to zero?
Rotate the dial counterclockwise until the burrs touch (producing a slight squealing sound). This position is zero. Back off slightly to the first usable setting. Verify by attempting to rotate the burr carrier—zero point should have minimal movement.
Can the Eureka Mignon Notte handle single-dose grinding?
The Eureka Mignon Notte works best with the hopper filled (weight-based pressure aids feeding). For single-dose workflows, use the bellows technique: grind beans, then use a bellows or palm slap to force retained grounds through the chute. Expect 1-1.5g retention per dose.
Why do espresso settings vary between different beans?
Bean density, roast level, and moisture content affect grind resistance. Light roast beans require finer grinding (1.0-1.2) due to higher density. Dark roast beans need coarser settings (1.5-1.8) because the expanded cell structure grinds more easily. Age also matters—older beans produce more fines.
How often should I replace the burrs?
Replace 50mm flat burrs after 500-1000 pounds of coffee throughput, depending on bean hardness. Dark roasts and soft beans extend burr life; light roasts and hard beans accelerate wear. Inspect visually every 6 months for edge deterioration, scoring, or chipping.
Conclusion: Mastering the Eureka Mignon Notte
The Eureka Mignon Notte delivers professional-grade grinding performance with proper dial setting knowledge. Starting at 1.0-1.5 for espresso and 3.0-3.5 for pour over provides reliable baselines, but bean characteristics and personal taste require fine-tuning through the micrometric collar. Managing the 1-1.5g grind retention through purging protocols ensures dose consistency and prevents flavor contamination.
Regular maintenance—daily brushing, weekly burr cleaning, and monthly deep cleaning—preserves grind quality and extends burr lifespan. Understanding the stepped adjustment system (0-5) combined with stepless micrometric tuning empowers precise calibration for any brewing method.
Record settings in a brewing journal, apply the Ross Droplet Technique to reduce static, and monitor burr wear indicators. With these practices, the Eureka Mignon Notte produces consistent, high-quality grounds for espresso and filter brewing methods throughout the grinder's service life.