Quick Cappuccino Recipe: 5-Minute Espresso Drink
A five-minute cappuccino delivers café-quality results when you follow an optimized workflow. Heat your machine while grinding. Steam milk during extraction. Use pre-programmed shot timers. This streamlined approach produces a proper 1:1:1 ratio cappuccino—equal parts espresso, steamed milk, and foam—without the typical 10-15 minute routine. Perfect for busy mornings when quality can't wait.
The 5-Minute Cappuccino Timeline
Start Machine & Prep
Turn on espresso machine. Fill pitcher with 4 oz cold milk. Place cup on warming tray.
Grind & Dose
Grind 18g beans while machine heats. Dose, distribute, and tamp into portafilter.
Extract Espresso
Lock in portafilter. Start extraction. Should yield 36g espresso in 25-30 seconds.
Steam Milk (Parallel)
Immediately start steaming. Stretch 3 seconds, then vortex to 150°F.
Pour & Serve
Tap pitcher, swirl, pour foam over espresso. Dust with cocoa if desired.
☕ Espresso Base
- • 18g dose
- • 36g yield
- • 25-30 seconds
- • Fine grind
🥛 Milk Foam
- • 4 oz cold milk
- • 150°F maximum
- • 3 sec aeration
- • Microfoam texture
⚡ Time Targets
- • Prep: 90 seconds
- • Extraction: 30 sec
- • Steaming: 60 sec
- • Total: 5 minutes
Essential Equipment for Speed
Speed requires the right tools. A quality burr grinder with timed dosing eliminates measurement steps. Dual-boiler or heat-exchange machines allow simultaneous brewing and steaming. A calibrated tamper ensures consistent pressure without guessing.
| Equipment | Time Saved | Why It Helps |
|---|---|---|
| Timer grinder | 30 seconds | Automatic dosing eliminates weighing |
| Dual boiler machine | 60 seconds | Brew and steam simultaneously |
| Clip-on thermometer | 15 seconds | Instant temp vs. hand testing |
| WDT tool | 10 seconds | Faster, more consistent distribution |
The Streamlined Workflow
Step 1: Machine Startup (0:00-1:30)
Turn on your espresso machine immediately upon entering the kitchen. While it heats (typically 60-90 seconds for modern machines), gather your equipment: portafilter, milk pitcher, cup, and beans. Place your cup on the machine's warming tray.
Fill your milk pitcher with 4 oz of cold whole milk straight from the refrigerator. Cold milk provides more time for proper aeration before reaching temperature. Purge your steam wand briefly to clear condensation.
Step 2: Grinding & Preparation (1:30-2:30)
Grind 18g of fresh espresso beans while the machine completes heating. If your grinder has timed dosing, set it for your standard double-shot dose. Transfer grounds to the portafilter.
Distribute evenly with a WDT tool or by tapping the portafilter sides. Tamp with consistent pressure—about 15 kg (30 lbs). The goal is flat, even compression, not maximum force. Lock the portafilter into the group head immediately.
Step 3: Extraction (2:30-3:00)
Start your shot extraction. A proper double shot yields 36g of espresso in 25-30 seconds. If your machine has programmable buttons, use them for consistency. Watch for the first drops at 5-8 seconds, then a steady stream resembling mouse tails.
Quick Extraction Check
- ✓ First drops: 5-8 seconds
- ✓ Flow rate: Steady, like warm honey
- ✓ Color: Dark brown transitioning to blonde
- ✓ Total time: 25-30 seconds
- ✓ Yield: 36g from 18g dose
Step 4: Simultaneous Steaming (3:00-4:00)
Here's where time savings happen. With a heat-exchange or dual-boiler machine, start steaming immediately after beginning extraction. Single-boiler users must wait for the shot to complete, then switch to steam mode (adds 30-60 seconds).
Insert the steam wand just below the milk surface at a slight angle. Open the steam valve fully. You'll hear a "tearing paper" sound—that's air incorporation. Count to 3 seconds, then submerge the wand tip fully and angle to create a vortex. Steam until the pitcher becomes uncomfortably hot to touch (approximately 150°F or 65°C).
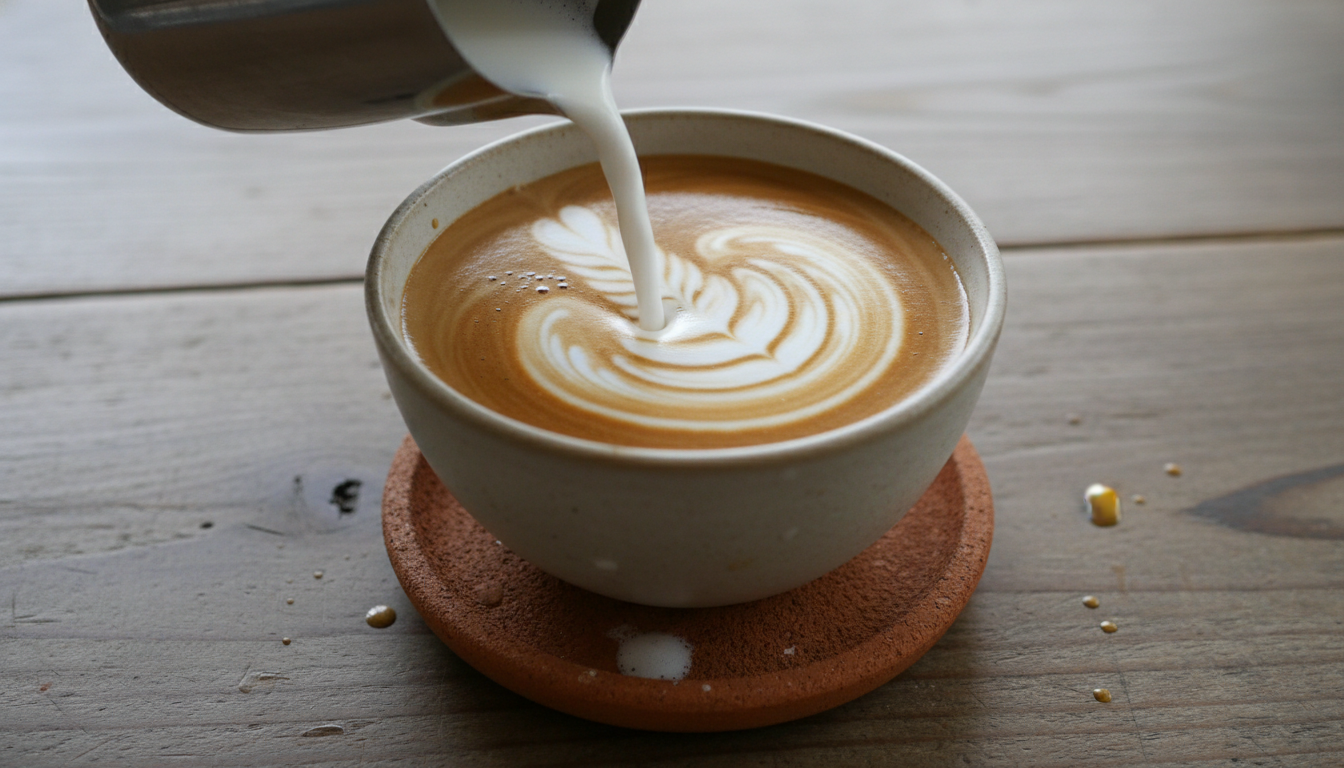
Step 5: Assembly (4:00-5:00)
Tap the milk pitcher firmly on the counter to break large bubbles. Swirl vigorously until the milk shines like wet paint—this indicates properly integrated microfoam. Pour the steamed milk over your espresso, using a spoon to hold back foam initially, then adding the foam layer on top.
A proper cappuccino has distinct layers: espresso at the bottom, steamed milk in the middle, and thick foam on top. Optional: dust with unsweetened cocoa powder or cinnamon.
Speed vs. Quality: Finding Balance
Rushing compromises quality—but efficiency doesn't have to. The key is parallel processing, not skipping steps. Never sacrifice proper extraction for speed. A 20-second shot tastes sour; a 40-second shot tastes bitter. Both ruin your cappuccino regardless of milk quality.
✓ Worth the Time
- • Proper grind size adjustment
- • 25-30 second extraction
- • Temperature monitoring
- • Microfoam technique
- • Fresh bean grinding
✗ Time Wasters
- • Over-measuring beans
- • Waiting between steps
- • Excessive tamping
- • Perfecting latte art
- • Multiple equipment wipes
Quick Fixes for Common Problems
Shot pulls too slow (35+ seconds)
Quick fix: Coarsen grind by one notch. Don't redose—use the same grounds and adjust for next time.
Shot pulls too fast (under 20 seconds)
Quick fix: Finer grind next time. For now, stop the shot early at 20 seconds to prevent over-extraction.
Milk too hot or scalded
Quick fix: Use a thermometer until you can judge by hand. Stop when pitcher is hot but holdable (140-150°F).
No microfoam, just bubbles
Quick fix: Check steam wand position—should be just below surface. Purge wand thoroughly before steaming.
Weekend Prep for Weekday Speed
Dedicated coffee enthusiasts can prepare components ahead. While fresh grinding is non-negotiable, you can program your grinder doses, organize equipment layout, and even mark optimal pitcher fill lines with tape. Some home baristas pre-heat cups with hot water while the machine warms.
Sunday Prep Checklist
- ☐ Clean and backflush machine
- ☐ Calibrate grinder for current beans
- ☐ Program shot timer doses
- ☐ Mark pitcher fill lines
- ☐ Organize equipment placement
- ☐ Stock fresh beans
- ☐ Check water filter status
- ☐ Wipe steam wand thoroughly
Continue Your Coffee Journey
Complete Cappuccino Guide
In-depth tutorial covering traditional technique, ratios, and advanced tips.
Morning Espresso Routine
Build a complete morning workflow including multiple drinks.
Milk Steaming Mastery
Perfect your microfoam technique for faster, better results.
Final Thoughts
The five-minute cappuccino isn't about cutting corners—it's about eliminating inefficiency. Every second saved comes from better workflow, not compromised quality. Parallel processing, proper equipment, and muscle memory development combine to deliver café-quality drinks on tight schedules.
Practice this workflow deliberately. Time each stage. Identify your personal bottlenecks. Within a month, five-minute cappuccinos become automatic, transforming your morning routine without sacrificing the ritual that makes home espresso special.
Ready to Optimize Your Entire Morning?
This quick cappuccino fits into a broader efficient morning routine. Learn how to prepare multiple drinks, clean as you go, and streamline every step.
See the complete morning routine →